How to Fix a Wobbly Chair Leg in 10 Minutes
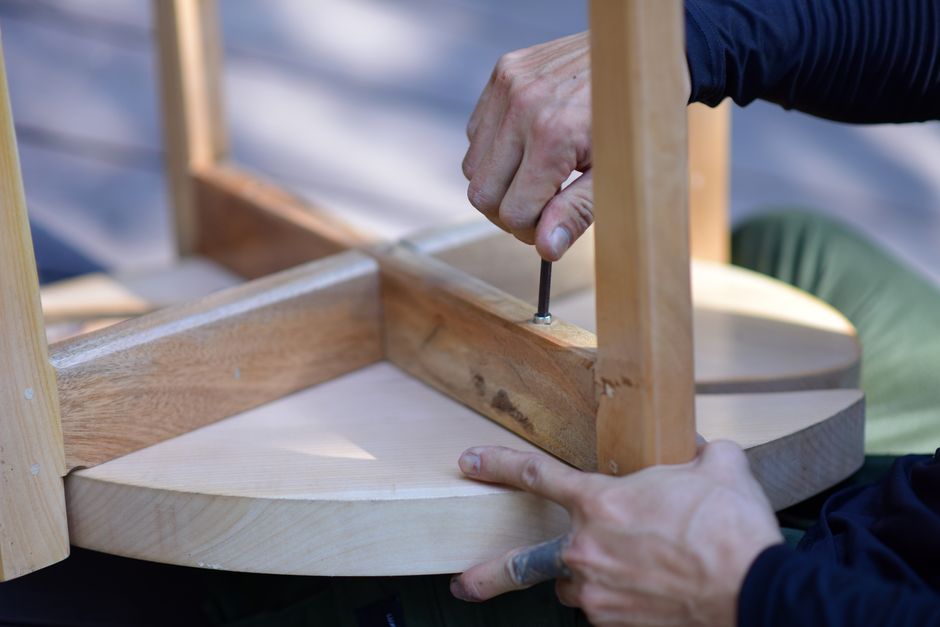
A loose chair leg is a common household annoyance that can interrupt daily comfort and, if left unaddressed, may lead to further damage to the chair’s frame. Over time, the repeated stress of sitting and movement can cause the glue in the joints to weaken or the wood itself to shrink slightly, creating gaps that result in instability. While the issue may seem minor, it often signals a need for simple maintenance that can restore the chair’s original function.
Fortunately, correcting a wobbly leg does not require advanced carpentry skills or expensive tools. With a few basic materials—primarily wood glue and a clamp—the repair can typically be completed in a short amount of time. The following sections outline a process-oriented approach to diagnosing the problem, preparing the joint, and securing the leg so that the chair returns to a stable state. No single outcome is guaranteed, as factors such as wood condition and glue setting time can influence results, but the method described here is widely used in furniture maintenance.
Identifying the Source of the Wobble
Before attempting any repair, it is important to determine exactly where the movement originates. A chair may wobble for reasons other than a loose leg, such as an uneven floor or a damaged stretcher (the crosspiece between legs). To isolate the cause, place the chair on a level surface and gently rock it while observing the joints. If the leg moves independently from the chair seat or rail, the joint itself is likely the source.
In many cases, the wobble comes from a loose tenon (the protruding part of the leg) inside a mortise (the hole in the chair frame). Over time, the wood-to-wood bond can degrade, allowing slight movement. Applying pressure from different angles can help confirm which leg is affected. Once the problematic leg is identified, the next step is to assess the condition of the joint—checking for old glue residue, dirt, or splintered wood that might interfere with a new bond. A thorough inspection now can prevent repeat loosening later.
Preparing the Joint and Gathering Materials
When the loose joint is confirmed, preparation becomes essential for a durable repair. Begin by removing the leg from the chair frame if possible. In some designs, the leg can be pulled out by hand after wiggling it gently. If the leg is stuck, avoid using excessive force; instead, tap it lightly with a rubber mallet or use a wooden block and hammer to avoid damaging the wood. Once removed, clean both the tenon and the mortise of any old glue, dust, or debris. A small chisel, sandpaper, or a stiff brush can be used for this purpose. Clean surfaces allow the new adhesive to penetrate the wood fibers more effectively.
Gathering the right materials beforehand streamlines the process. The primary items include a wood glue suitable for furniture repair—such as polyvinyl acetate (PVA) or aliphatic resin glue—and a clamp that can reach the joint. A bar clamp or a strap clamp often works well for chair legs. Additionally, a damp cloth for wiping excess glue, wax paper or a plastic sheet to protect the chair finish from clamp marks, and possibly a shim (a thin piece of wood) if the joint is too loose can be useful. Products like those offered by RestoreCraft include wood glues formulated for strong bonding in furniture applications, though many standard wood glues are also effective.
Applying Wood Glue for a Secure Bond
With the joint clean and dry, the next phase involves applying the glue in a manner that maximizes contact between the surfaces. Spread a thin, even layer of glue on the tenon, taking care to cover all sides. Some practitioners also apply a small amount inside the mortise, though this can cause excess glue to squeeze out later. The goal is to achieve full coverage without over-saturating, as excess glue can weaken the bond or create a messy cleanup.
After applying the glue, insert the leg into the mortise and twist it slightly to distribute the adhesive evenly. If the joint feels very loose, wrapping the tenon with a thin layer of cotton string or using a wooden shim coated with glue may help fill the gap. This technique is not always necessary, but it can be considered when the gap is significant. Once the leg is fully seated, wipe away any glue that oozes out with a damp cloth. It is important to remove excess glue before it sets, as dried glue can interfere with finishing later and may look unsightly.
Clamping and Allowing for Proper Setting Time
Clamping applies consistent pressure to hold the joint immobile while the glue cures. Position the clamp so that it presses the leg firmly into the chair frame without distorting the wood or the chair’s geometry. For a chair leg, a strap clamp that wraps around the legs and seat can distribute pressure evenly. Alternatively, a bar clamp with padded jaws can be used, placing protective pads between the clamp and the chair to prevent dents. Tighten the clamp gently—overtightening can squeeze out too much glue and weaken the joint.
The setting time depends on the type of glue used. Most wood glues require at least 30 minutes to an hour of clamping for initial set, though a full cure may take 24 hours. It is advisable to leave the clamp in place for the manufacturer’s recommended minimum time. During this period, the chair should not be moved or put under any load. Temperature and humidity can affect curing speed; a warmer, drier environment generally accelerates the process. After the clamp is removed, allow additional time for the bond to reach full strength before regular use. The repair’s longevity can vary based on wood species, glue quality, and usage patterns, so periodic checks are a sensible practice.
Finishing Touches and Long-Term Considerations
Once the glue has fully cured, inspect the joint for any remaining gaps or excess glue. If dried glue is visible, it can be carefully scraped away with a chisel or sanded lightly with fine-grit sandpaper, taking care not to damage the surrounding finish. For painted or stained chairs, touching up the area with matching color may help the repair blend in. The leg should now feel solid, though minor seasonal movement in wood can sometimes cause slight changes over time.
To extend the life of the repair, consider factors such as how the chair is used and where it is placed. Keeping the chair away from extreme humidity or direct heat sources can reduce wood expansion and contraction that stress joints. Routine inspections, especially after moving or heavy use, can catch early signs of loosening. In cases where multiple legs are affected or the chair frame shows other damage, a more comprehensive restoration may be needed. The approach described here offers a practical starting point for maintaining furniture stability, with the understanding that each situation may present unique variables.